

Amy H.
Werkt goed, binne 24 al uitgehard mooi begin pakket
Betty L.
Voor het eerst met epoxy aan de gang geweest met het pakket voor onderzetters. Wat is dat leuk om te doen en wat een mooi resultaat. Ben er blij mee en ga hier zeker verder mee!
Angelica H.
Mijn eerste epoxy-werkje gemaakt. Een nieuwe verslaving is ontstaan.
mariska s.
helaas is 1 mal al stuk gegaan na 3x gebruiken ..
gebruik dit paket, zo als het beschreven staat in de bijgeleverde folder,daarna.maak de mal met n sopje schoon in warm water.
verder leuk en compleet setje
Cindy V.
Dik tevreden
Alien S.
Heel leuk pakket, zeer tevreden. Mooie kleuren. Ik kan mij er uren mee vermaken :)
Suzanne N.
Mijn allereerste poging van een geode onderzetter is aardig goed gelukt. Het is allemaal nieuw voor me dus dan is het altijd afwachten of je het leuk vind maar het is me goed bevallen. Het enige nadeel van de set vond ik dat er geen handschoenen of maatbeker bij zat.
Ingrid O.
Leuk om mee te werken. Niet moeilijk. Alleen de uithard periode is voor mij lastig.
Sandra J.
1ste x onderzetters gemaakt. Leuk om te doen.
A. d.
Heel leuk om voor de eerste keer met epoxy aan de slag te gaan.
Ze zijn goed gelukt, duidelijke beschrijving.
M’n schoonmoeder was blij met haar “knutselwerk” voor Moederdag.
Denise G.
Het starterspakket voor geode onderzetters gekocht en was heel erg leuk om te maken. Zeer tevreden met alles wat er bij geleverd werd.
Tiff
Fantastisch
Saskia V.
Fijn product, duidelijke instructie, mooi resultaat
Diane D.
Dit is mijn eerst project, het was even zoeken, maar het is toch gelukt
Gitte B.
Super complete set, heel leuk resultaat!
Kimberly B.
Super fijne site! Snel geleverd en een handige handleiding
katrijn v.
Al snel meer gekocht.
Martine V.
Snelle levering en perfecte uitleg op de site en bij de levering. Goede materialen.
Renate B.
Snelle verzending!
Katia D.
Snelle service, goede uitleg
Katrijn V.
Zeer leuk om te maken!
Salma Z.
Super mooie onderlegger kunnen maken met het starterspakket
Lynn K.
Heel blij met deze set. Netjes mee te werk kunnen gaan en heel tevreden met het resultaat voor de eerste keer. De hars hard snel uit, was binnen 24u al droog. Top kwaliteit!
Stephanie B.
Eerste keer een bestelling geplaatst en really loving it!
C. P.
Wat een geweldig leuke set! Helemaal compleet op iets om schoon te maken na, maar dat komt waarschijnlijk omdat ik als echte beginner ben gestart. Mooie mal, handig in gebruik. In handleiding staat dat je zelf in moet schatten hoeveel epoxy je nodig hebt, erg lastig als beginner dus wellicht dat hier nog een verdere instructie bij kan. Nu al genieten van het kunstwerk, maar helaas niet geschikt voor de kant- en klare mix en dus wel even wachten op het eindresultaat als ze uit de mal mogen.
Daneesha W.
Onwijs blij met deze aankoop! Super snelle verzending.
Peggy V.
Is zo fijn om mee te werken. Zou eens een hele grote fles van beiden moeten aankopen
Nina V.
Heel makkelijk te maken, top kwaliteit en leuk om samen te doen
Patty v.
Deze set gebruikt voor deze onderzetters. Momenteel harden ze nog uit maar het ziet er in de mal al heel mooi uit.
Stefanie D.
superleuke onderzetters kunnen maken met deze set!
Wilma B.
Ik vond het niet duidelijk hoeveel gieters ik voor all 5 onderzetters nodig had. Dat mooiste ik in de omschrijving. Ik vond het ook lastig in te schatten hoeveel kleurstof er in moet. Ik vind de kleur daardoor te licht. Uiteindelijk vind ik dat de goudsnippers niet in 1/3 deel had gemoeten.
Stefanie Z.
Heel blij met dit complete onderzetter pakket. Hars is ruim genoeg en de pigmenten zijn erg mooi. De goudvlokken ook. Binnen een dag netjes thuisbezorgd
astrid R.
Super tevreden
Delphine N.
Leuk om te doen! Was de eerste keer voor mij het was wat zoeken in het begin
Laura V.
Super goed gelukt de eerste keer dankszij de producten van Itsokay!
Marieke S.
Is leuk om te doen even uitvogelen hoe het precies werkt.
Marij M.
IS HEEL GOED GELUK EN OOK HEEL MOOI DE EERSTE IS ALTIJD ZOEKEN HOE EN WAT
elieth d.
Super pakket ziet er goed uit
Moniek B.
Super blij mee en top spullen
Remke V.
Super mooie geworden. kleur is top, de hele set geeft je allerlei mogelijkheden.
Samantha B.
Super leuk om te maken ook simpel.
Liz D.
Goed gelukt, duidelijke uitleg. Aanrader!
Wendy V.
Netjes verpakt en heel snel geleverd.
Samira B.
Kwaliteit is super. Alle spullen die ik heb besteld ben ik enorm tevreden mee.
Kathy B.
Megaleuk en makkelijk om te maken. Goede instructies meegeleverd.
Tessa B.
Zo leuk!
Dit was mijn eerste resin project, maar ik be nu al om!
Hele fijne kit met alles er in voor de eerste keer resin gebruiken!
Monique L.
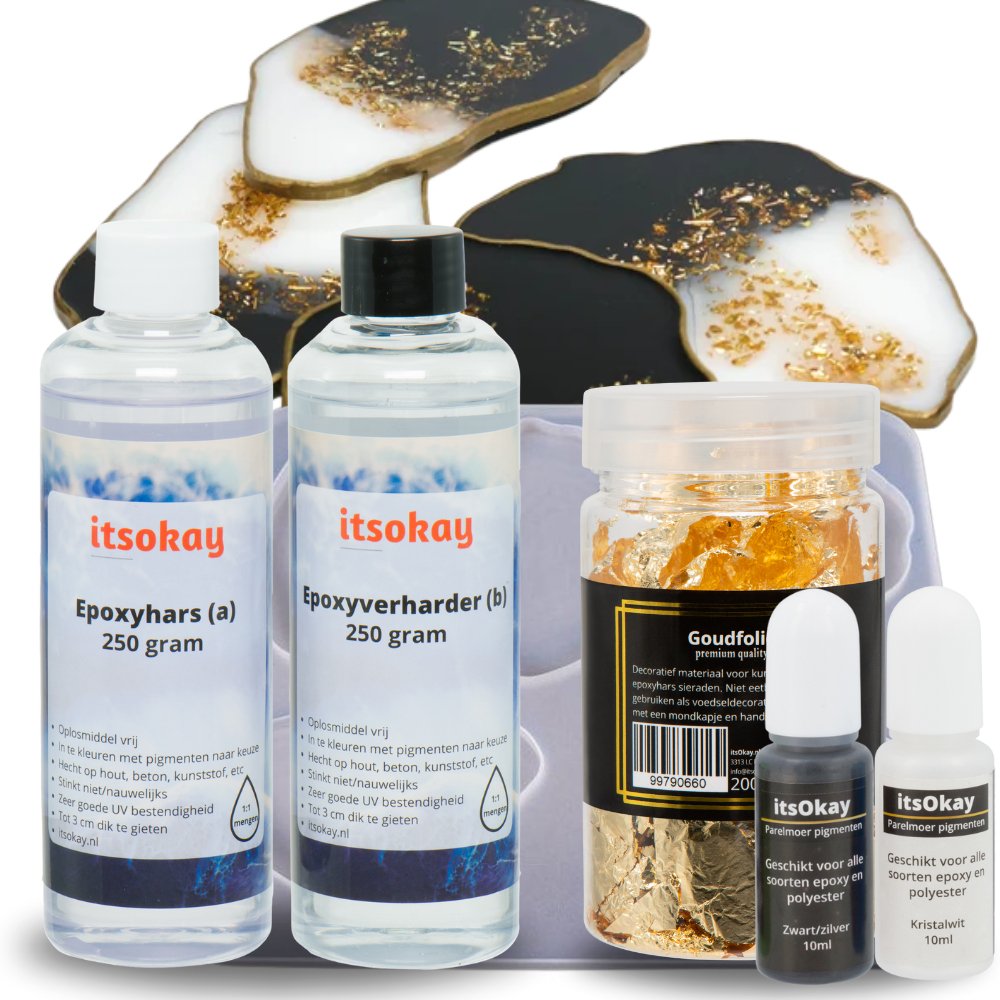
Eerste keer met een starters pakket. Spannend maar super mooi geworden. Nu zwart / wit / goud pakket, maar nieuwe kleuren onderweg
INGRID A.
Simpel te maken!
Sabrina T.
Voor de zomer eerste keer, direct aan deze begonnen. Vond het super leuk.
Ulika G.
super leuke en complete set!
Lesley D.
Eerste onderzetters waren direct goed gelukt. Leuke vorm!
Alexandra V.
Aangenaam verrast van de snelheid en klant vriendelijkheid! Bedankt aan jullie topteam!
Marinde B.
Leuke start pakket om onderzetters te maken. Genoeg variaties mee mogelijk door het goud wit en de kleur die je kiest. Onderzetters groot genoeg voor elk glas.
Esther H.
Super! Volgende dag al in huis! Erg mooi spul om mee te werken en super makkelijk. Voor t eerst een onderzetter gemaakt en ga er meerdere maken en ook zeker meer bestellen hier.
Marina P.
Super makkelijk te maken en ziet er echt fantastisch uit!
Marieke W.
Heel fijne kit, ik heb mijn eerste onderlegger net gemaakt, ik ben benieuwd naar het resultaat! Alles is ook duidelijk via de handleiding.
Tessa K.
Leuke set om mee te beginnen, erg snel binnen ook.
Charlene B.
Erg leuk! Makkelijk om te maken.
Lisette L.
Super snelle levering en fijn product
Luna S.
Alles zoals op de foto, goed verpakt en snel verzonden
Nancy H.
Wat ontzettend leuk dat jullie een proefpakket hebben. Ontzettend leuk om te maken. Ik ben om! Ik ben fan! Ik wil meer. :-)
Katrien V.
Heel blij met het resultaat.
Mooier dan verwacht.
Zal meerdere mallen bestellen.
Aurelie W.
Leuke onderzetters. De goudfolie is ook heel leuk om mee te werken.
Eva V.
Super service
Thérèse H.
Mijn eerste werk mijn expory,
Fantastisch, geen vervelende geur. Ik ben tevreden , ik ga zeker nog een bestelling plaatsen en reclame maken over deze site
Petra L.
Mooie set om een onderzetter mee te maken. De witte pigment dekt prima en de mal is van een goede stevige kwaliteit. De giethars is eenvoudig te mengen en is iets stroperig waar door hij goed uit te schenken is met twee verschillende kleuren. Bij de giethars zijn weinig tot geen luchtbellen zichtbaar.
Nancy B.
Super leuk pakket! Ze zijn nog niet allemaal af, maar tot nu toe zijn de instructies duidelijk en ik ben verkocht aan deze nieuwe hobbie!
Eddy D.
Een heel goed product
K T.
Stinkt niet, makkelijk om te maken en nog leuk om te doen ook!
Anita B.
Mooie kleuren en topkwaliteit. Heel tevreden over
Glenda R.
Ben zeer tevreden met dit setje. Was makkelijk te gebruiken. Heb er echt iets moois van kunnen maken en ben blij met het resultaat. Zeker een aanrader om dit te kopen als je voor de eerste keer een creatie wil maken met Resin Art.
Rosalie H.
Dit zijn de eerste twee die ik met de set gemaakt heb en ik heb nog hars over. Ik ben benieuwd naar hoe de andere eruit komen te zien en wacht op de komst van mijn nieuwe bestelling. Altijd goed bij jullie en leuke acties Verslaafd
Marissa W.
Klantenservice goed bereikbaar, top service, snel in huis en nu nog aan de slag en knutselen maar!
Charlotte L.
Geweldig om te maken! En eenvoudig. Ik heb een puur zwarte gemaakt zonder de witte pigmenten die erbij zaten en met het bladgoud (zat er ook bij) heel leuk!
yvonne k.
Zo heerlijk ontspannend om te doen! Van begin tot het einde. Neem er wel de tijd voor en lees goed de beschrijving. Mijn eerste projectje is mislukt door mijn ongeduld.... Ik heb schelpjes gezocht en die verwerkt in de onderzetter mal. Je kan je eigen draai eraan geven en hoeft niet persé de pigmenten te gebruiken. Het resultaat vind ik geweldig. Ook met mijn kleinkinderen van 7 en 10 jaar leuke dingen gemaakt een mooi contact moment !!
Alice A.
Thuis zijn wij volop bezig te experimenteren hiermee. Behalve dat we klant zijn, zijn we fan van jullie klantvriendelijkheid . Met de vakantie in zicht is dit een van onze leukste bezigheden :) Leuk dat jullie dit hebben toegevoegd aan jullie assortiment.
Marcia S.
erg leuk om te maken
Bibi B.
Eerste keer onderzetter s gemaakt super blij met het reseltaat
Bibi B.
De levering was super snel gister besteld en vandaag al in huis lijkt me super gaaf en leuk om mee te beginnen als iemand mij ooit zou vragen waar die leuke onderzetter s vandaan komen raad ik ze aan om ze bij jullie te bestellen voor de gene die het leuk vind helemaal top gr bibi
corinne
Makkelijk te maken met de hars die bij de set zit. Je kan het volgens de beschrijving doen die erbij zit, maar zoals je ziet kan je ook je eigen plan trekken
Jolanda56
Geadviseerd door een vriendin die dit via Facebook al eens eerder besteld had. Kwam vlot geleverd. Het weekend gaan we het samen maken :) Zin in! gr jolanda
MarloesJ
Super leuk kan niet wachten om te beginnen


